
“`html
If you’re craving a delicious, wholesome treat that feels like a bakery favorite but packs a serious nutritional punch, this High Protein Greek Yogurt Bagels Recipe is exactly what you need. With its dense, chewy texture and subtle tanginess from the Greek yogurt, these bagels are an absolute game-changer—easy to make, delightfully satisfying, and perfect for breakfast, snacks, or anytime hunger strikes.
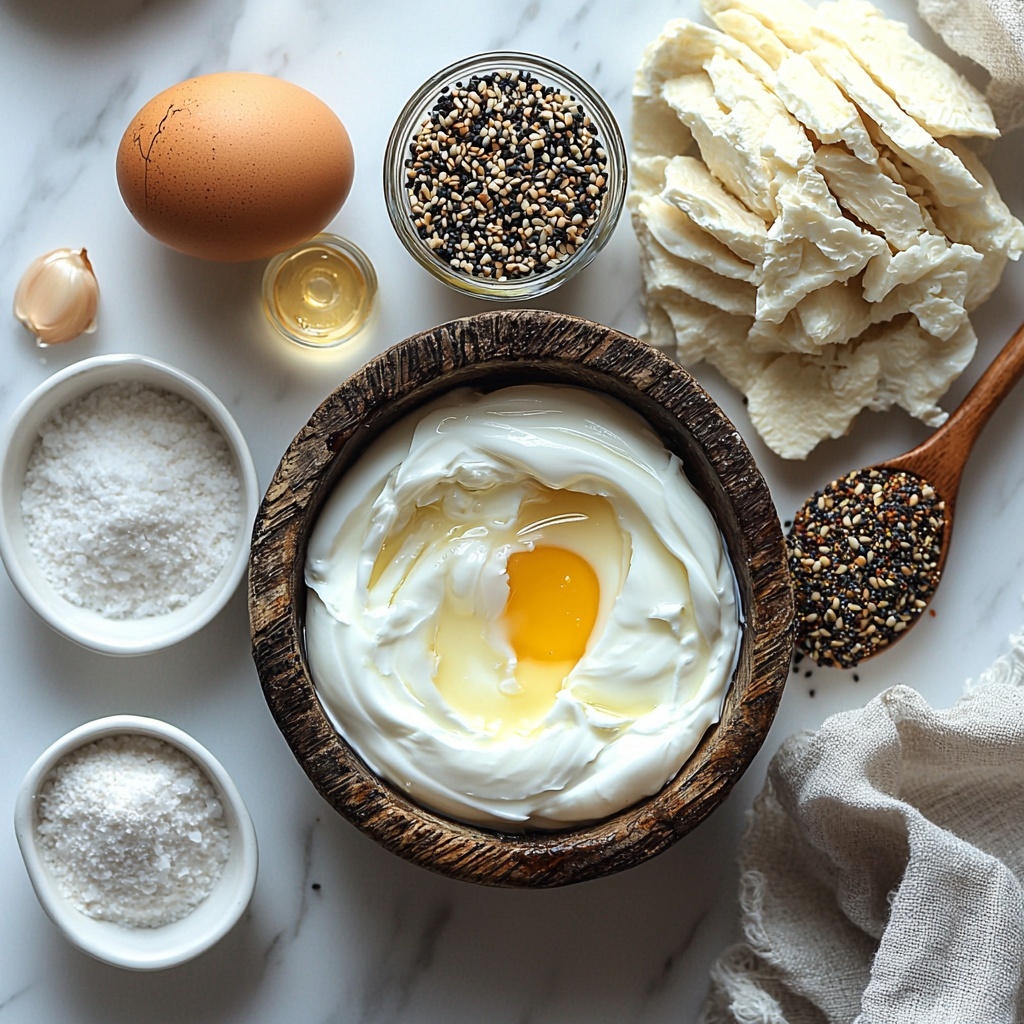
Ingredients You’ll Need
This High Protein Greek Yogurt Bagels Recipe calls for a handful of simple, pantry-friendly ingredients that come together magically. Each component plays a key role: the Greek yogurt adds moisture and protein, the self-rising flour keeps things light and fluffy, and the everything bagel seasoning brings that signature savory punch.
- 1 cup Greek yogurt: Use plain, either full-fat or nonfat, for that creamy tang and extra protein boost.
- 1 cup self-rising flour: Provides effortless leavening—if unavailable, you can make your own by combining all-purpose flour with baking powder and salt as a substitution guide suggests.
- 1 egg: Optional but perfect for brushing on top to achieve a golden, shiny crust.
- 1 teaspoon salt: Optional, but it enhances flavor depth beautifully.
- 1 teaspoon honey or sugar: Adds a subtle sweetness that balances the tang of the yogurt.
- 1 tablespoon everything bagel seasoning: Or go wild with sesame seeds, poppy seeds, or your favorite topping to personalize the finish.
How to Make High Protein Greek Yogurt Bagels Recipe
Step 1: Prepare Your Oven and Workspace
Start by heating your oven to 375°F (190°C). While it reaches the perfect temperature, line a baking sheet with parchment paper to ensure your bagels don’t stick and have an easy release with a clean, smooth bottom.
Step 2: Mix the Dough
In a large bowl, combine your Greek yogurt and self-rising flour (or the flour plus baking powder and salt mix). Stir until a shaggy dough starts to form, then get your hands in there and knead for 2-3 minutes until the dough is smooth and workable. If it’s still sticky, sprinkle in a little extra flour. This part is crucial for that perfect bagel texture, so don’t rush it!
Step 3: Shape Your Bagels
Divide the dough into four equal pieces. Roll each portion into a log, then connect the ends to form a ring shape—classic bagel style. This step is fun and gives your hands a workout, and you’ll start to see those charming little bagel shapes take form right in your kitchen.
Step 4: Add a Beautiful Finish
For that irresistible golden kiss, brush the tops of your bagels with a beaten egg. This step is optional but highly recommended if you want a shiny, bakery-perfect surface. After brushing, sprinkle everything bagel seasoning or your choice of seeds generously atop each bagel.
Step 5: Bake to Perfection
Place your shaped and topped bagels onto the parchment-lined baking sheet, then slide them into the oven. Bake for 20 to 25 minutes, until they turn a gorgeous golden brown and have that slightly firm, chewy exterior. The aroma alone at this point is enough to make your mouth water!
Step 6: Cool and Enjoy
Once baked, allow your bagels to cool for a few minutes—this helps them finish setting and makes slicing easier. Then, go ahead and slice open those warm, fluffy bagels to toast, spread with cream cheese, or top however you like. Trust me, these are best enjoyed fresh but can keep giving joy even after!
How to Serve High Protein Greek Yogurt Bagels Recipe
Garnishes
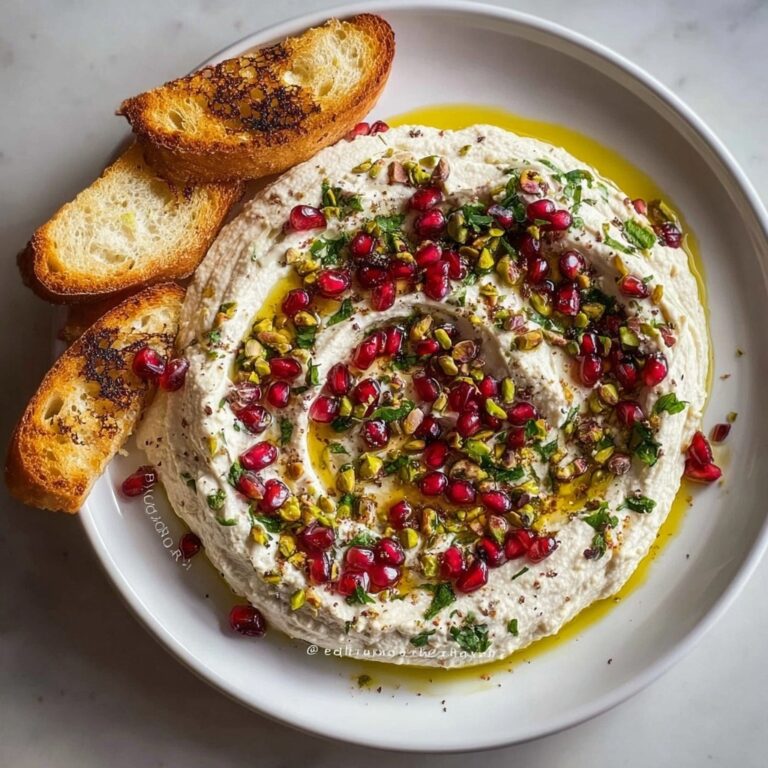
These bagels are like a blank canvas waiting for your favorite toppings. Cream cheese, smoked salmon, avocado slices, or even a dollop of nut butter all pair beautifully. Don’t forget fresh herbs like dill or chives to brighten the flavors. The versatility here is endless, making your bagel experience unique every time.
Side Dishes
Pair your warm, protein-packed bagels with a refreshing fruit salad, a green smoothie, or a bowl of your favorite soup to make a wholesome, balanced breakfast or lunch. The protein in these bagels keeps you full, while the sides add freshness and variety.
Creative Ways to Present
Turn these bagels into mini sandwiches layered with turkey and spinach for a satisfying lunchbox treat. Or serve sliced bagels with a colorful spread of dips and veggies at your next brunch or gathering. These bagels hold their shape wonderfully, making them perfect for creative plating and presentation styles.
Make Ahead and Storage
Storing Leftovers
If you have any leftover High Protein Greek Yogurt Bagels, store them in an airtight container or zipped plastic bag at room temperature. They’ll stay fresh and chewy for 3 to 4 days—perfect if you want to grab one for a quick breakfast during the week.
Freezing
To enjoy these bagels longer, slice them and freeze in an airtight bag or container. Frozen bagels maintain their taste and texture for up to 2 months. When you want to indulge, just pop a slice or whole bagel straight from the freezer.
Reheating
Reheat frozen or refrigerated bagels by toasting them directly or warming in a preheated oven at 350°F for about 5 to 7 minutes. This helps restore that warm, chewy bite and brings back the fresh-baked experience.
FAQs
Can I use regular flour instead of self-rising flour?
Absolutely! To substitute for 1 cup of self-rising flour, mix 1 cup all-purpose flour with 1 ½ teaspoons baking powder and ¼ teaspoon salt. This gives your bagels the perfect rise and texture.
Is it necessary to use Greek yogurt, or can I use regular yogurt?
Greek yogurt is preferred because of its thicker consistency and higher protein content, which help the dough hold together and achieve that dense texture bagels are known for. Regular yogurt is more watery and might make the dough too sticky.
Can I make these bagels vegan or dairy-free?
This recipe relies on Greek yogurt and an egg wash for texture and golden finish, so making it vegan would require substitutions like dairy-free yogurt and possibly a flax egg or aquafaba. However, adjustments may affect texture and rise.
Why do these bagels have a different texture compared to boiled traditional ones?
Traditional bagels are boiled before baking to create a chewy crust. These bagels skip boiling, using the yogurt and self-rising flour instead, resulting in a softer, denser bagel that’s still incredibly delicious and much quicker to make.
Can I add flavorings or mix-ins to the dough?
Definitely! Incorporate herbs, garlic powder, cinnamon, or dried fruits into the dough to customize your bagels. Just be mindful not to add too much moisture, which could affect the dough’s consistency.
Final Thoughts
I can’t recommend the High Protein Greek Yogurt Bagels Recipe enough if you’re looking for a quick, nutritious, and absolutely tasty homemade bread option. They’re straightforward to make, bursting with flavor, and flexible enough to suit any meal or mood. Give this recipe a whirl—you might just find yourself swapping out your store-bought bagels forever!
“`
Print
High Protein Greek Yogurt Bagels Recipe
- Prep Time: 10 minutes
- Cook Time: 25 minutes
- Total Time: 35 minutes
- Yield: 4 bagels
- Category: Breakfast, Snack
- Method: Baking
- Cuisine: American
- Diet: Low Fat
Description
These High Protein Greek Yogurt Bagels are a quick and nutritious homemade treat that combines creamy Greek yogurt with self-rising flour for a soft, chewy texture. Perfect for breakfast or snacks, they are easy to make with minimal ingredients and customizable toppings like everything bagel seasoning. Baking them in the oven gives a golden crust with a tender inside, offering a high-protein alternative to traditional bagels.
Ingredients
Main Ingredients
- 1 cup Greek yogurt (plain, full-fat or nonfat)
- 1 cup self-rising flour (or 1 cup all-purpose flour + 1 ½ tsp baking powder + ¼ tsp salt)
Optional Additions
- 1 egg (for egg wash, optional)
- 1 teaspoon salt (optional, for extra flavor)
- 1 teaspoon honey or sugar (optional, for slight sweetness)
- 1 tablespoon everything bagel seasoning (or sesame seeds, poppy seeds, etc.)
Instructions
- Preheat Oven: Preheat the oven to 375°F (190°C) and prepare a baking sheet by lining it with parchment paper to prevent sticking during baking.
- Mix Dough: In a large bowl, combine the Greek yogurt and self-rising flour until a dough forms. Knead the dough with your hands for 2-3 minutes until smooth, adding a little more flour if the mixture is too sticky to handle.
- Shape Bagels: Divide the dough into four equal portions. Roll each portion into a log shape and then join the ends together to form a round bagel shape.
- Apply Egg Wash: If desired, beat the egg and brush the tops of each bagel to help achieve a shiny and golden crust during baking.
- Add Toppings: Sprinkle the bagels with your choice of everything bagel seasoning or other toppings like sesame seeds or poppy seeds to add flavor and texture.
- Bake: Place the bagels on the parchment-lined baking sheet and bake in the preheated oven for 20-25 minutes, or until they turn golden brown and are cooked through.
- Cool and Serve: Allow the bagels to cool for a few minutes on a wire rack before enjoying them warm or at room temperature.
Notes
- Use Greek yogurt with the fat content of your choice; full-fat yields richer flavor, nonfat will be lighter.
- If self-rising flour is unavailable, create your own by mixing all-purpose flour with baking powder and salt as indicated.
- Adding honey or sugar is optional and can slightly sweeten the dough for contrast with savory toppings.
- Substitute or omit the egg wash for a vegan option; the bagels will be less glossy but still delicious.
- These bagels are best enjoyed fresh but can be stored in an airtight container for up to 2 days or frozen for longer storage.


