“`html
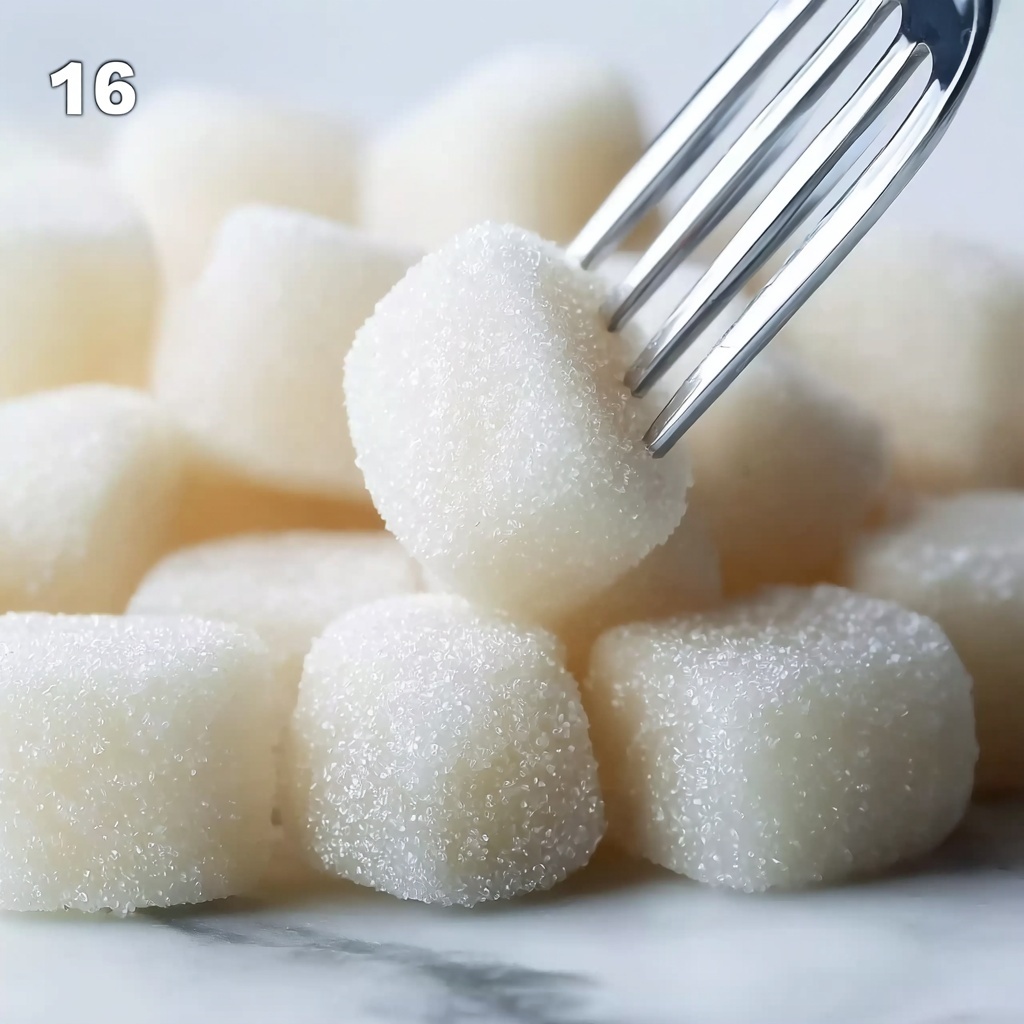
If you are craving a delightfully chewy and subtly sweet treat, the Milk Mochi Bites Recipe is your new best friend in the kitchen. These fluffy little squares offer a perfect blend of creamy milk richness and that unique, addictive texture only glutinous rice flour can provide. They are the kind of dessert that feels soothing, nostalgic, and exciting all at once—easy to make yet effortlessly elegant for sharing with friends and family. Once you try this recipe, I promise, it will become a staple whenever you want a bite of sweet comfort with a Japanese-inspired twist.
Ingredients You’ll Need
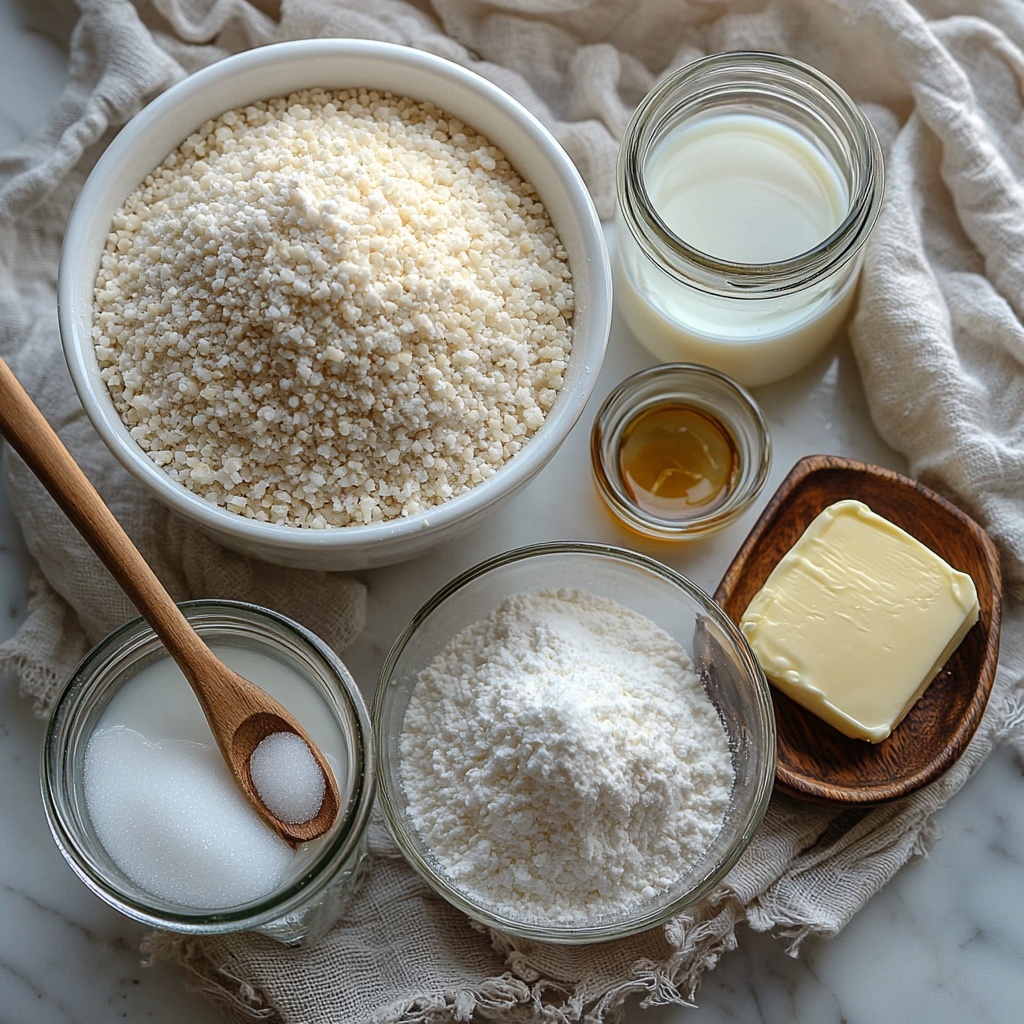
This Milk Mochi Bites Recipe calls for a handful of wonderfully simple ingredients that work in harmony to deliver chewy, tender bites. Each item is carefully chosen to contribute to the mochi’s smooth texture, sweet flavor, and beautiful milky tone.
- 1 cup glutinous rice flour: This is the magic ingredient that gives mochi its signature soft, chewy texture.
- 1/3 cup granulated sugar: Adds just the right amount of sweetness without overpowering the delicate flavors.
- 1 cup whole milk: Brings creamy richness and moistness, making the mochi incredibly tender.
- 1 tablespoon unsalted butter: Adds a silky smoothness and a subtle buttery depth to the dough.
- 1/2 teaspoon vanilla extract: Lends a warm, aromatic note that beautifully complements the milk’s natural creaminess.
- 1/3 cup cornstarch or potato starch (for dusting): Prevents sticking and ensures your mochi bites maintain their perfect shape and softness.
How to Make Milk Mochi Bites Recipe
Step 1: Combine the base ingredients
Start by whisking together the glutinous rice flour, granulated sugar, and whole milk in a medium saucepan until the mixture is perfectly smooth—no lumps allowed. This simple step sets the stage for an irresistibly luscious mochi dough.
Step 2: Cook the mixture evenly
Place your saucepan over medium-low heat and begin stirring with a spatula continuously. This constant stirring, for about 6 to 8 minutes, encourages the mixture to thicken and transform into a sticky, smooth dough. Patience here is key to avoid lumps and ensure the perfect chewy consistency.
Step 3: Add flavor enhancements
Once thickened, stir in the unsalted butter and vanilla extract until fully incorporated. These will infuse your mochi dough with a subtle richness and fragrant warmth that make it so comforting and delicious.
Step 4: Prepare your workspace
Lightly dust a clean work surface with cornstarch or potato starch. Transfer the hot mochi dough onto this surface, dust the top generously with more starch, and let it cool just enough so it’s safe to handle but still pliable.
Step 5: Shape and cut your mochi bites
Gently roll or press the dough into about a 1/2 inch thickness. Using a knife or dough cutter, slice the mochi into small bite-sized squares. Toss the pieces lightly in additional starch to prevent sticking, and voilà—you have your Milk Mochi Bites ready to enjoy!
How to Serve Milk Mochi Bites Recipe
Garnishes
While the Milk Mochi Bites are delightful on their own, a light dusting of matcha powder or a sprinkle of toasted sesame seeds can add dimension and a little flair. You might also try dipping them in a thin drizzle of sweetened condensed milk or dusting with shredded coconut for an extra layer of flavor.
Side Dishes
Serve this chewy, sweet dessert with a cup of hot green tea or jasmine tea to balance the flavors and cleanse the palate. Fresh fruits like ripe mango, strawberries, or kiwi also make wonderful accompaniments if you want a refreshing contrast.
Creative Ways to Present
For a fun twist, arrange your Milk Mochi Bites on a pretty serving tray lined with colorful parchment or edible flowers. You could also skewer them as bite-sized mochi kebabs or layer them in a clear glass bowl with alternating layers of sweetened red bean paste or fruit compote for a stunning dessert parfait.
Make Ahead and Storage
Storing Leftovers
If you find yourself with extra Milk Mochi Bites, store them in an airtight container at room temperature. They maintain their best texture and flavor for up to one day. Beyond that timeframe, they might start to harden or lose their signature chewiness.
Freezing
While technically possible to freeze mochi, it is best enjoyed fresh to fully appreciate its tender, chewy texture. If you must freeze, wrap each bite tightly in plastic wrap and place them in an airtight container or freezer bag for up to one month. Thaw at room temperature before serving, but note they may lose some softness.
Reheating
To gently restore softness, warm your Milk Mochi Bites in the microwave for 10 to 15 seconds or steam them briefly. This quick reheating helps revive that delightful chewy texture without drying them out.
FAQs
Can I use milk alternatives for this Milk Mochi Bites Recipe?
Absolutely! While whole milk gives the best creamy texture, you can substitute with almond milk, coconut milk, or oat milk. Keep in mind these may slightly alter the flavor and consistency, but they still yield tasty mochi bites.
What is the best starch for dusting and coating?
Potato starch is preferred for its light, soft coating that enhances the mochi’s chewiness. However, cornstarch works well too and is a great alternative if you don’t have potato starch on hand.
How do I prevent the mochi from sticking to my hands and work surface?
Generously dust your hands and working surface with cornstarch or potato starch before handling the hot mochi dough. This simple step prevents sticking and helps you shape and cut the bites easily.
Can I add flavors to the mochi dough?
Definitely! Incorporate matcha powder, cocoa powder, or fruit powders into the dough during the mixing step to create unique and vibrant flavor variations of the Milk Mochi Bites Recipe.
How chewy are these mochi bites?
They have a delightful, tender chew that is soft but still pleasantly elastic. The balance of glutinous rice flour and milk ensures a texture that’s more delicate than traditional mochi cakes, making them very easy to bite into and enjoy.
Final Thoughts
There’s something so comforting and joyful about creating treats like these Milk Mochi Bites. Their chewy texture, subtle sweetness, and milky richness combine to create a dessert you’ll want to revisit time and again. Give this recipe a try—you’ll quickly see why it becomes a beloved classic for sharing, snacking, or whenever you need a delicious pick-me-up.
“`
Print
Milk Mochi Bites Recipe
- Prep Time: 10 minutes
- Cook Time: 8 minutes
- Total Time: 18 minutes
- Yield: 20 bites
- Category: Dessert
- Method: Stovetop
- Cuisine: Japanese Inspired
- Diet: Gluten Free, Vegetarian
Description
Milk Mochi Bites are a soft and chewy Japanese-inspired dessert made from glutinous rice flour, sweetened with sugar and infused with the richness of whole milk and a hint of vanilla. These bite-sized treats are lightly dusted with cornstarch to prevent sticking and can be enjoyed fresh or stored for up to a day.
Ingredients
Milk Mochi Dough
- 1 cup glutinous rice flour
- 1/3 cup granulated sugar
- 1 cup whole milk
- 1 tablespoon unsalted butter
- 1/2 teaspoon vanilla extract
For Dusting
- 1/3 cup cornstarch or potato starch
Instructions
- Mix Ingredients: In a medium saucepan, whisk together the glutinous rice flour, granulated sugar, and whole milk until the mixture is smooth and free of lumps.
- Cook the Mixture: Place the saucepan over medium-low heat and cook the mochi batter, stirring constantly with a spatula for about 6 to 8 minutes until it thickens and becomes sticky and smooth.
- Add Butter and Vanilla: Stir in the unsalted butter and vanilla extract until fully incorporated into the thickened mochi dough.
- Prepare Work Surface: Lightly dust a clean work surface with cornstarch to prevent the mochi from sticking.
- Transfer and Cool Dough: Carefully transfer the hot mochi dough onto the dusted surface, then dust the top with additional cornstarch. Allow it to cool for a few minutes until it’s safe to handle but still pliable.
- Shape and Cut Mochi: Roll or gently press the dough out to about 1/2 inch thickness. Use a knife or dough cutter to cut the mochi into small bite-sized squares.
- Coat and Serve: Toss the cut mochi bites lightly in extra cornstarch to keep them from sticking together. Serve immediately or store in an airtight container at room temperature for up to one day.
Notes
- Work quickly while the mochi is still warm because it becomes firmer as it cools.
- Potato starch gives a softer texture when used for coating, but cornstarch is a convenient alternative.
- Feel free to add matcha powder, cocoa powder, or fruit powder to the dough for different flavor variations.


