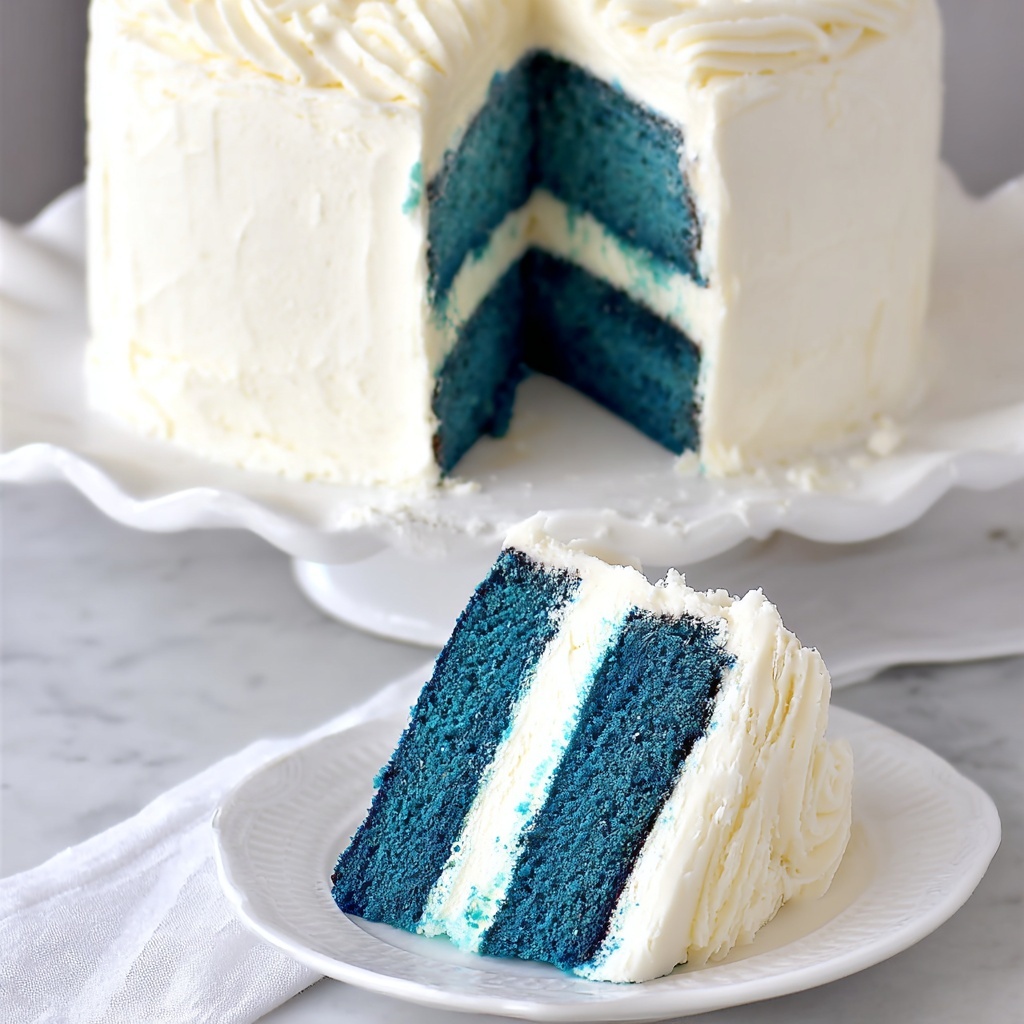
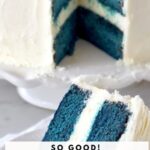
If you’re searching for a show-stopping dessert that’s as delightful to the eyes as it is to the palate, this Blue Velvet Cake Recipe is bound to become your new favorite. Its vibrant royal blue layers paired with a subtle hint of cocoa create a velvety texture and stunning color that will captivate everyone at your table. The balance of sweet and creamy flavors makes it perfect for celebrations or cozy nights in, proving that a cake can be both beautiful and deeply satisfying.
Ingredients You’ll Need
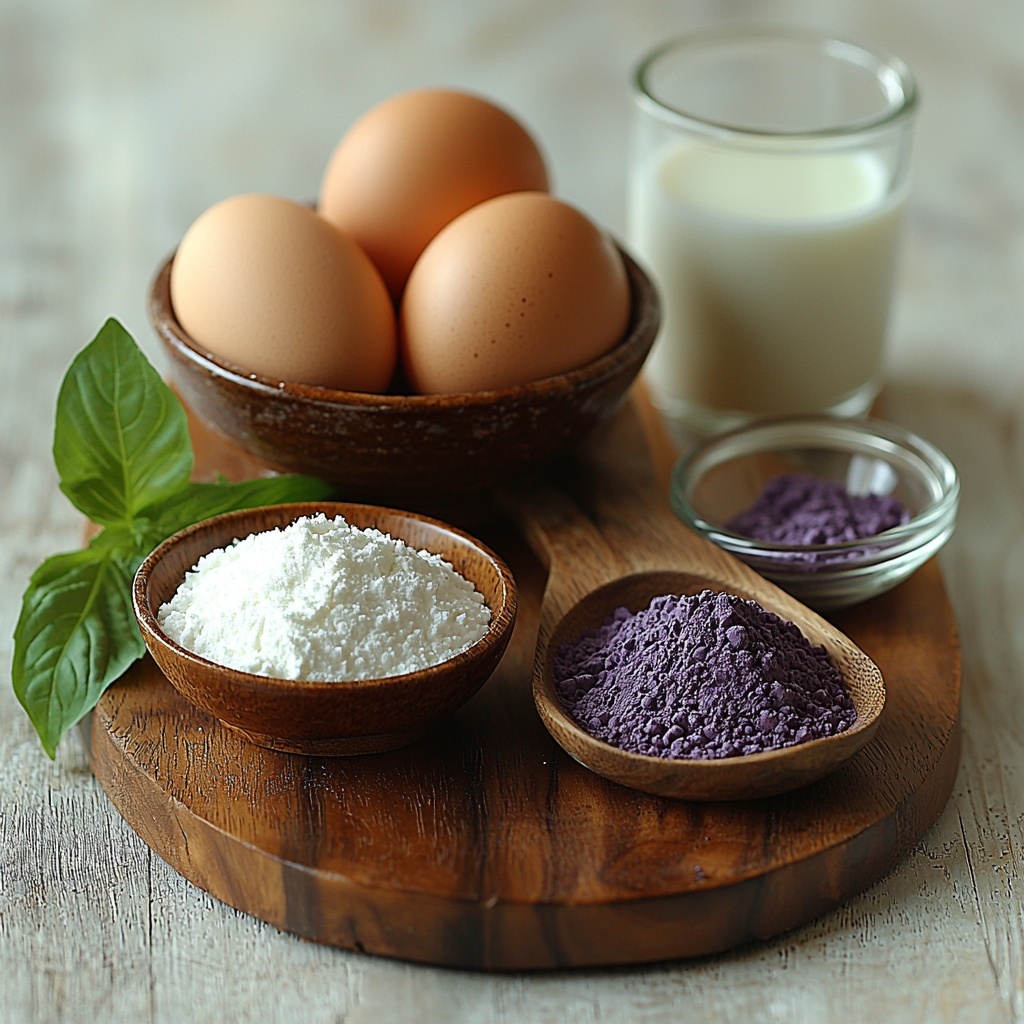
The beauty of this Blue Velvet Cake Recipe lies in its straightforward yet intentional ingredients. Each component works harmoniously to build the cake’s tender crumb, bold color, and luscious flavor. From the rich shortening that ensures softness to the subtle cocoa that lends complexity to the vibrant hues, every item has its starring role.
- ½ cup shortening: Provides a tender, moist texture that keeps the cake soft for days.
- 1 ½ cups sugar: Sweetens the cake perfectly without overpowering other flavors.
- 2 large eggs: Binds ingredients and adds richness for a luscious crumb.
- 1 ounce royal blue gel paste food color: The key to that stunning, signature vibrant blue look.
- 2 drops violet gel paste food color: Adds depth and richness to the blue, making it pop beautifully.
- 2 tablespoons unsweetened cocoa powder: Provides a subtle chocolate note that balances the sweetness and enhances the color.
- 2 ¼ cups all-purpose flour: The structure backbone, ensuring your cake holds together perfectly.
- 1 scant teaspoon kosher salt: Enhances all the flavors, creating balance and complexity.
- 1 teaspoon vanilla extract: Adds warmth and rounds out the flavor profile.
- 1 cup buttermilk: Brings moistness and a slight tang that keeps the cake fresh tasting.
- 1 teaspoon baking soda: Helps the cake rise beautifully, giving it that light, airy texture.
- 1 tablespoon distilled white vinegar: Reacts with baking soda to create a perfect rise and tenderness.
How to Make Blue Velvet Cake Recipe
Step 1: Prepare Your Oven and Pans
Start by preheating your oven to 350 degrees F to ensure even baking right from the get-go. Grease and flour three 8-inch round cake pans thoroughly so your beautiful blue layers will come out clean and intact.
Step 2: Cream Your Base
Beat the shortening and sugar together until they’re light and fluffy—this usually takes about three minutes and is crucial for that airy texture everyone loves. Then, add the eggs one at a time, making sure each one is fully incorporated for a silky smooth batter.
Step 3: Mix the Color Paste
In a small bowl, combine the royal blue and violet gel colors with the cocoa powder to form a paste. This ensures the blue is vivid and evenly distributed without overpowering bitterness from the cocoa.
Step 4: Combine Dry Ingredients
Whisk together the flour and salt in a separate bowl. These dry ingredients will provide the cake’s structure, so keep them ready for alternating with liquids in the next step.
Step 5: Prepare Buttermilk Mixture
Pour the buttermilk and vanilla extract into a measuring cup. This blend will add moistness and tender crumb with a touch of fragrant vanilla to deepen the cake’s flavor.
Step 6: Alternately Combine Ingredients
Gradually mix the flour and buttermilk mixtures into your creamed base, starting and ending with the flour. Take your time scraping down the sides of the bowl to ensure a consistently smooth batter.
Step 7: Incorporate Leavening Agents
Lower your mixer speed and blend in the baking soda gently. Then add the vinegar, being careful not to overmix; this reaction creates the lift that guarantees a light cake.
Step 8: Bake to Perfection
Distribute the batter evenly between the three pans. Bake for around 25 minutes, or until the cakes gently pull away from the pan edges and a toothpick comes out clean. This step will gift you perfectly risen, tender, and moist layers.
Step 9: Cool Completely
Allow your Blue Velvet Cake layers to cool thoroughly before frosting. This patience pays off by preventing melting or sliding toppings and ensures every bite is as flawless as it looks.
How to Serve Blue Velvet Cake Recipe
Garnishes
Nothing brings this cake to life quite like the perfect garnishes. Try a dollop of freshly whipped cream or a dusting of edible glitter to sparkle alongside the velvety blue hues. Fresh blueberries or a sprinkle of white chocolate shavings add great contrast and texture.
Side Dishes
Pair your Blue Velvet Cake Recipe with light, refreshing sides like a citrus fruit salad or a scoop of vanilla bean ice cream. These choices balance the cake’s rich sweetness and bring a delightful finishing touch to your dessert experience.
Creative Ways to Present
Stack the layers tall and straight, or slice into neat squares and plate with a drizzle of berry coulis. For a party centerpiece, turn your cake into a layered trifle with alternating blueberry compote and whipped cream. Presentation is a chance to amp up the wow factor!
Make Ahead and Storage
Storing Leftovers
After enjoying a slice or two, wrap the leftover cake tightly with plastic wrap or place it in an airtight container. Store it in the refrigerator for up to 4 days to keep it moist and vibrant.
Freezing
This Blue Velvet Cake Recipe freezes beautifully. Wrap each cooled layer well in plastic wrap and foil and freeze them for up to 3 months. When ready, thaw overnight in the refrigerator before assembling and frosting.
Reheating
If you prefer your cake slightly warm, pop individual slices in the microwave for about 15 seconds. This warms the crumb and enhances the flavors without drying it out.
FAQs
Can I use regular vanilla extract instead of the paste food coloring?
Vanilla extract and paste food coloring serve very different purposes. The vanilla extract adds flavor, while the gel paste food coloring provides that iconic blue color. So, you’ll want to keep the food coloring for the signature look and use vanilla extract for taste.
What makes this a “Blue Velvet” cake rather than just blue cake?
The blend of cocoa powder and the vibrant blue color along with the tender moist crumb creates a unique flavor and texture combination distinct from a simple dyed cake. That subtle chocolate undertone gives a “velvet” richness that elevates this recipe.
Can I substitute shortening with butter?
You can substitute butter, but it may slightly change the texture and moisture level. Shortening maintains moisture longer and creates a fluffier crumb, while butter lends deeper flavor but can make the cake denser.
How important is the vinegar in this recipe?
Vinegar reacts with the baking soda to give the cake lift and tenderness, so it is an essential ingredient. Omitting it could result in a denser, less tender cake.
Is this recipe good for a large party?
Absolutely! This Blue Velvet Cake Recipe yields 24 servings, making it an ideal choice for celebrations or gatherings where you want to impress both with flavor and presentation.
Final Thoughts
There’s something truly magical about baking a cake that dazzles not just in taste but also in appearance. This Blue Velvet Cake Recipe is just that—a stunning, delicious treat that’s sure to earn compliments and smiles wherever you serve it. Give it a try for your next special occasion, and watch this recipe quickly become a beloved classic in your kitchen.
Print
Blue Velvet Cake Recipe
- Prep Time: 20 minutes
- Cook Time: 25 minutes
- Total Time: 45 minutes
- Yield: 24 servings
- Category: Dessert
- Method: Baking
- Cuisine: American
Description
This Blue Velvet Cake recipe is a vibrant twist on the classic red velvet, featuring a striking royal blue hue enhanced by violet gel food coloring and a hint of cocoa. Moist and fluffy, this cake is layered and perfect for celebrations, combining the rich flavors of buttermilk and vanilla with a tender crumb that’s sure to impress.
Ingredients
Cake Batter Ingredients
- ½ cup shortening
- 1 ½ cups sugar
- 2 large eggs
- 1 ounce royal blue gel paste food color
- 2 drops violet gel paste food color
- 2 tablespoons unsweetened cocoa powder
- 2 ¼ cups all-purpose flour
- 1 scant teaspoon kosher salt
- 1 teaspoon vanilla extract
- 1 cup buttermilk
- 1 teaspoon baking soda
- 1 tablespoon distilled white vinegar
Instructions
- Preheat Oven: Preheat your oven to 350 degrees Fahrenheit to prepare for baking the cake layers.
- Prepare Cake Pans: Grease and flour three 8-inch round cake pans thoroughly to prevent the cake from sticking.
- Cream Shortening and Sugar: Using a mixer, beat the shortening and sugar together until the mixture is light and fluffy, about three minutes. This step aerates the batter for a tender crumb.
- Add Eggs: Incorporate the eggs one at a time into the creamed mixture, making sure each egg is fully blended before adding the next.
- Mix Food Coloring with Cocoa: In a small bowl, blend the royal blue and violet gel food colors with the cocoa powder to create a vivid color paste, then add it to the batter, mixing well.
- Combine Dry Ingredients: In a separate medium bowl, stir together the all-purpose flour and kosher salt, and set aside.
- Mix Buttermilk and Vanilla: Combine the buttermilk and vanilla extract in a measuring cup and set aside for use in alternating additions.
- Alternate Adding Dry and Wet Ingredients: Gradually add the flour mixture and buttermilk mixture to the creamed batter alternately, beginning and ending with the flour mixture. Scrape down the sides of the bowl often to ensure even mixing.
- Add Baking Soda and Vinegar: Reduce the mixer speed and blend in the baking soda fully. Then, gently mix in the vinegar without overworking the batter to maintain its light texture.
- Bake the Cake: Evenly divide the batter among the three prepared cake pans. Bake for 25 minutes or until the cakes start to pull away from the pan edges and a toothpick inserted in the center comes out clean.
- Cool the Cakes: Allow the cakes to cool completely in their pans before removing and frosting as desired.
Notes
- Ensure not to over mix after adding vinegar to keep the cake tender and avoid deflation.
- Use gel paste food coloring for vivid, intense colors without adding extra liquid.
- Allow cakes to cool completely before frosting to prevent melting or sliding layers.
- Check cake doneness by inserting a toothpick in the center; it should come out clean or with a few crumbs attached.
- This cake pairs beautifully with cream cheese or vanilla buttercream frosting.
