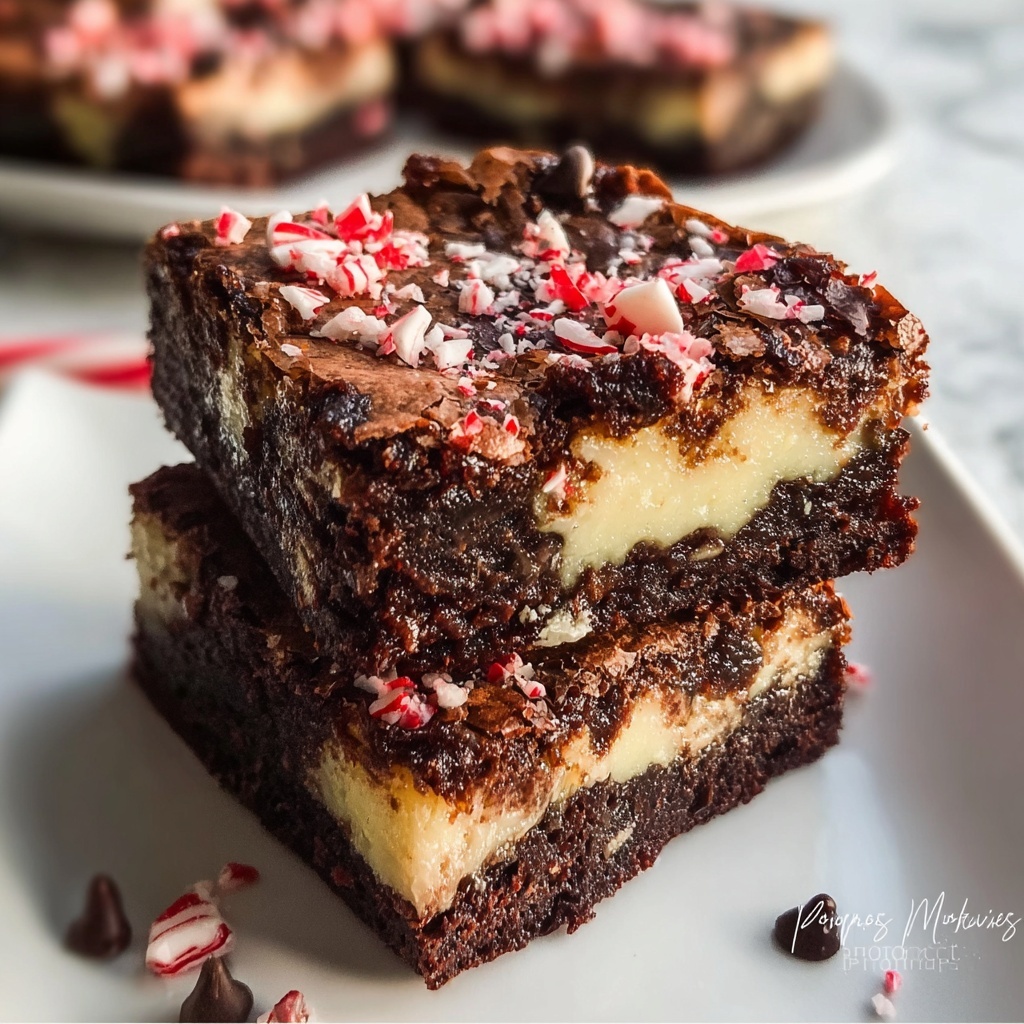
If you are searching for the perfect festive treat that combines rich chocolate with a refreshing twist, look no further than the Christmas Peppermint Brownie Bars Recipe. These bars unite fudgy cocoa goodness with the bright crunch of peppermint candies and melty pockets of chocolate chips, creating a dessert that is as delightful to the eyes as it is to the taste buds. Whether you’re preparing for a holiday party or simply want a cozy indulgence, this recipe delivers classic flavors with an exciting peppermint punch that will keep everyone coming back for more.
Ingredients You’ll Need
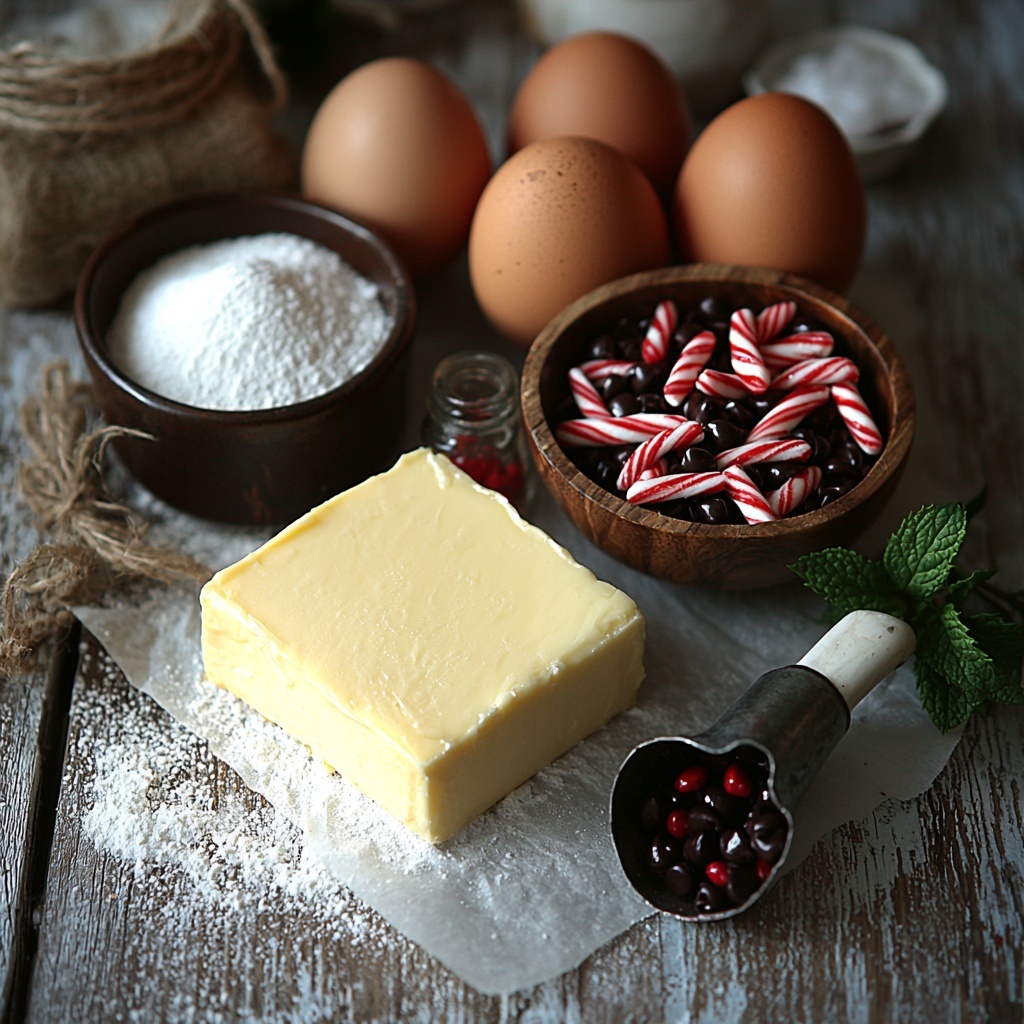
The beauty of this Christmas Peppermint Brownie Bars Recipe lies in its simplicity. Each ingredient is carefully chosen to build luscious layers of flavor and texture, from the richness of butter to the zing of peppermint. You don’t need a long list of exotic components—just trusty pantry staples and a dash of festive spirit.
- 1 cup unsalted butter: Provides the creamy, rich base that makes the brownies moist and fudgy.
- 2 cups sugar: Sweetens the batter perfectly, ensuring each bite satisfies your holiday sweet tooth.
- 4 large eggs: Bind everything together and give the brownies their structure.
- 1 teaspoon vanilla extract: Adds warmth and enhances the chocolate and peppermint flavors.
- 1 cup all-purpose flour: The foundation for the brownie’s tender crumb.
- 1 cup cocoa powder: Delivers deep chocolate flavor and a rich color.
- 1/2 teaspoon salt: Balances sweetness and sharpens the chocolate notes.
- 1 cup crushed peppermint candies: Brings a refreshing, minty crunch that is pure holiday magic.
- 1 cup chocolate chips: Melts into gooey pockets of chocolaty goodness throughout the bars.
How to Make Christmas Peppermint Brownie Bars Recipe
Step 1: Preheat the Oven and Prepare the Pan
Start by heating your oven to 350°F (175°C). Grease a 9×13 inch baking pan thoughtfully; this ensures your brownie bars will come out cleanly without sticking, giving you those perfect edges and an easy release.
Step 2: Melt Butter and Combine with Sugar
In a large bowl, melt the unsalted butter until smooth, then stir in the sugar. This warm mixture melts the sugar slightly, creating a glossy, rich base that’s crucial for soft, chewy brownies.
Step 3: Add Eggs and Vanilla
Beat in the eggs one at a time, followed by the vanilla extract. This step brings everything together by creating a smooth, light batter that will rise just enough and remain decadently moist after baking.
Step 4: Incorporate Dry Ingredients
Gently mix in the flour, cocoa powder, and salt. Stir until just combined, being careful not to overmix—overworking the batter can lead to tougher brownies instead of the tender texture we’re aiming for.
Step 5: Fold in Peppermint and Chocolate Chips
Carefully fold in the crushed peppermint candies and chocolate chips. This is where the magic happens: the mint adds cool contrast, and the chocolate chips melt to create those irresistible pockets of gooey sweetness.
Step 6: Bake to Perfection
Pour your batter into the prepared pan and spread evenly. Bake for 25-30 minutes or until a toothpick inserted in the center comes out clean. Don’t overbake; you want fudgy bars with a slight chew rather than a dry cake.
Step 7: Cool and Cut
Allow the bars to cool fully before slicing. This helps them set up nicely, making them easier to cut and enhancing the texture. Then, get ready to enjoy bites of festive, chocolatey bliss!
How to Serve Christmas Peppermint Brownie Bars Recipe
Garnishes
To elevate these Christmas Peppermint Brownie Bars, sprinkle a few extra crushed peppermint candies on top right after baking for an eye-catching sparkle and added crunch. You can also drizzle melted white chocolate for a beautiful finish that complements the minty flavors perfectly.
Side Dishes
These brownie bars pair wonderfully with a scoop of vanilla ice cream or a dollop of whipped cream. For the adults, a cup of hot cocoa with a cinnamon stick or a peppermint mocha will enhance the holiday vibes and round out the indulgence.
Creative Ways to Present
Try serving the bars on a festive platter lined with red and green napkins for holiday parties. You can stack them in a cookie tin to create a homemade gift, or even use cookie cutters to shape the bars into festive forms like stars or Christmas trees for an extra-special touch.
Make Ahead and Storage
Storing Leftovers
Store any leftover Christmas Peppermint Brownie Bars in an airtight container at room temperature, where they will stay fresh and chewy for 3-4 days. Keeping them sealed is key to preserving their fudgy texture and peppermint crunch.
Freezing
If you want to make these bars ahead of time, wrap them tightly in plastic wrap and then foil, or place them in a freezer-safe container. They freeze beautifully for up to 2 months. When you’re ready to enjoy, thaw them at room temperature, then slice and serve.
Reheating
To bring back that freshly baked warmth, pop a brownie bar in the microwave for about 15-20 seconds. This melts the chocolate chips slightly and revives the softness, making every bite taste like it just came out of the oven.
FAQs
Can I use peppermint extract instead of crushed peppermint candies?
Yes! If you prefer a smoother texture without the crunch, adding 1/2 teaspoon of peppermint extract can give you that cool mint flavor without the candy pieces. Just remember to reduce sugar slightly if you want to maintain balance.
What pan size should I use for this recipe?
The recipe works best in a 9×13 inch baking pan to ensure the bars are thick enough to stay fudgy but will bake through properly. Using a smaller pan will make them too thick for even baking.
Can I substitute oil for butter?
Butter gives the bars their classic rich texture and flavor, so it is recommended. However, you can use an equal amount of vegetable oil for a slightly different but still delicious result.
How can I tell when the brownie bars are done?
Look for edges that have set and slightly pulled away from the pan. A toothpick inserted in the center should come out with a few moist crumbs but not wet batter. This ensures a fudgy but fully baked center.
Are these bars gluten-free?
Not as written. However, you can replace the all-purpose flour with a gluten-free flour blend suitable for baking to make a gluten-free version. Just ensure your cocoa powder and other ingredients are also certified gluten-free.
Final Thoughts
There is something truly special about the Christmas Peppermint Brownie Bars Recipe—it takes the beloved brownie to a whole new level with a refreshing holiday twist. With just a handful of simple ingredients and straightforward steps, these bars become an irresistible part of any seasonal celebration. Gather your loved ones, bake up a batch, and watch the smiles light up the room with every minty-chocolatey bite!
Print
Christmas Peppermint Brownie Bars Recipe
- Prep Time: 15 minutes
- Cook Time: 30 minutes
- Total Time: 45 minutes
- Yield: 16 servings
- Category: Dessert
- Method: Baking
- Cuisine: American
Description
Delight in the festive flavors of these Christmas Peppermint Brownie Bars, combining rich chocolatey goodness with refreshing peppermint crunch. Perfectly fudgy and topped with crushed peppermint candies and chocolate chips, these bars make a festive treat for holiday gatherings or cozy winter nights.
Ingredients
Brownie Batter
- 1 cup unsalted butter
- 2 cups sugar
- 4 large eggs
- 1 teaspoon vanilla extract
- 1 cup all-purpose flour
- 1 cup cocoa powder
- 1/2 teaspoon salt
Toppings and Mix-ins
- 1 cup crushed peppermint candies
- 1 cup chocolate chips
Instructions
- Preheat Oven: Preheat your oven to 350°F (175°C) to ensure an even baking temperature for the brownie bars.
- Prepare Pan: Grease a 9×13 inch baking pan thoroughly to prevent sticking and make the bars easy to remove once baked.
- Melt Butter & Mix Sugar: In a large bowl, melt the unsalted butter until liquid and mix in the sugar, blending until smooth and combined.
- Add Eggs & Vanilla: Incorporate the eggs one at a time along with the vanilla extract, stirring continuously until the mixture is uniform and creamy.
- Add Dry Ingredients: Sift together the flour, cocoa powder, and salt, then gradually mix these dry ingredients into the wet batter until fully combined.
- Fold in Peppermint & Chocolate: Gently fold in the crushed peppermint candies and chocolate chips, distributing them evenly throughout the batter.
- Pour Batter: Pour the prepared batter into the greased baking pan, spreading it evenly to the edges for uniform baking.
- Bake: Place the pan in the preheated oven and bake for 25-30 minutes, or until a toothpick inserted into the center comes out clean or with a few moist crumbs.
- Cool and Serve: Remove from oven and let the brownie bars cool completely in the pan before cutting into 16 servings to maintain their fudgy texture.
Notes
- Ensure the butter is fully melted but not hot when mixing with sugar to avoid cooking the eggs prematurely.
- Adjust baking time slightly depending on your oven; start checking at 25 minutes.
- Use fresh peppermint candies for maximum flavor and crunch.
- For extra chocolate intensity, use semi-sweet or dark chocolate chips.
- Cool completely before cutting to avoid crumbling.
- Store bars in an airtight container at room temperature for up to 4 days.
- These bars can be frozen for up to 2 months; thaw at room temperature before serving.

