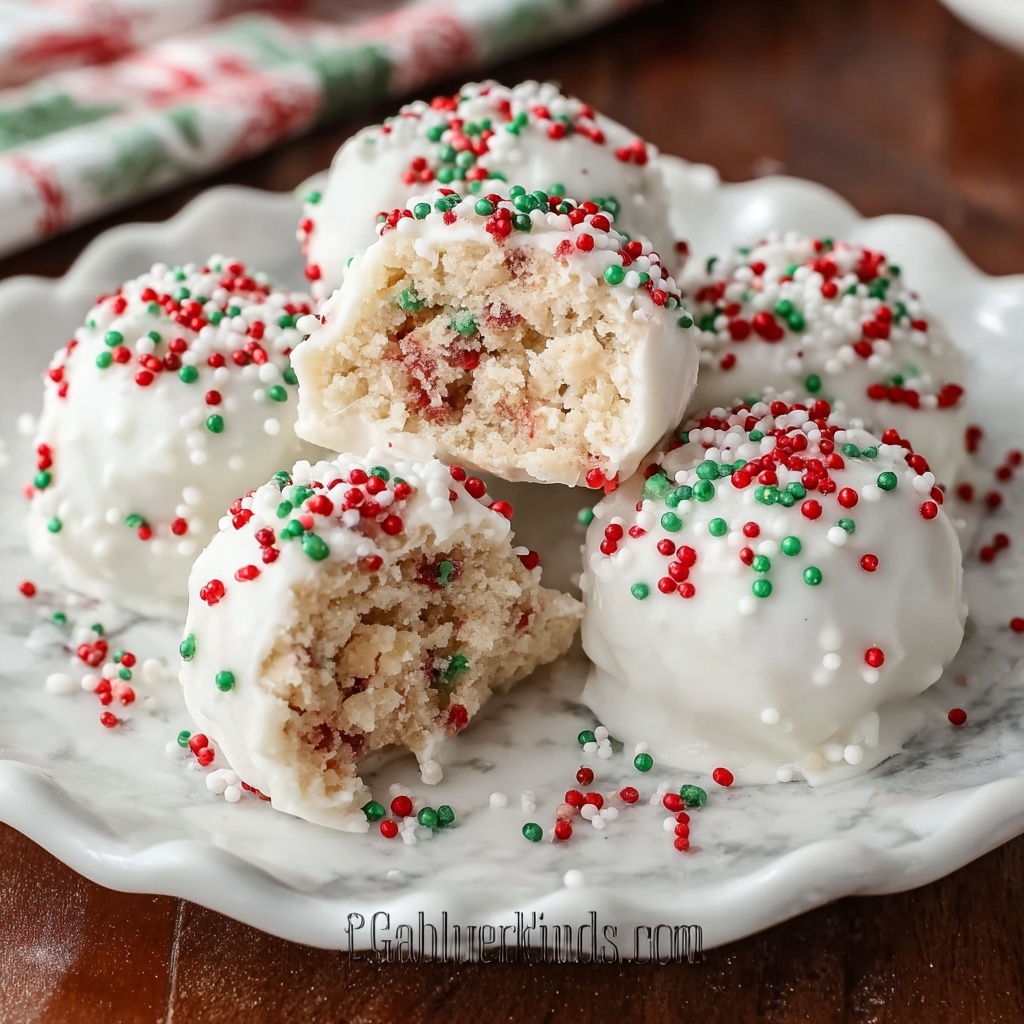
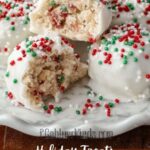
If you’re hunting for a dessert that quickly transforms your holiday spirits into pure joy, then this Little Debbie Christmas Cake Balls Recipe is exactly what you need. Imagine the iconic Little Debbie Christmas Tree Cakes crushed to perfection, blended with creamy richness, then dipped into luscious white chocolate and trimmed with festive sprinkles. These bite-sized wonders deliver layers of nostalgic flavors and irresistible sweetness, making them an absolute crowd-pleaser for any celebration. Let me walk you through why these festive treats deserve a spot on your dessert table this season!

Ingredients You’ll Need
For this recipe, simplicity meets magic in the form of just a handful of ingredients. Each component plays a crucial role in building the perfect texture and flavor, from the moist cake crumbs to the creamy binding and that smooth, decadent white chocolate coating.
- 1 box Little Debbie Christmas Tree Cakes (10 cakes): The star of the show, providing that classic cake flavor and festive touch.
- 1/2 cup cream cheese, softened: Adds creaminess and helps bind the crumbs together for that perfect cake ball consistency.
- 1/2 teaspoon vanilla extract: Enhances and rounds out the flavors with a warm, sweet aroma.
- 1 cup white chocolate chips: Creates the silky, sweet coating that covers each cake ball.
- 1 tablespoon vegetable oil: Helps melt and smooth out the white chocolate for easy dipping.
- Red and green sprinkles (optional): Adds that festive, colorful sparkle to your finished cake balls.
How to Make Little Debbie Christmas Cake Balls Recipe
Step 1: Crumble the Cake
Begin by breaking down those cheerful Little Debbie Christmas Tree Cakes into fine crumbs. Whether you use your hands or a fork, the goal is to get a light, fluffy texture that will mix beautifully with the cream cheese. This step sets the base for everything delicious to come.
Step 2: Mix Ingredients
Next, add the softened cream cheese along with the vanilla extract to your bowl of cake crumbs. Use a spoon or your hands to mix everything thoroughly until the texture is smooth and sticks together when pressed. This creamy blend makes rolling cake balls a breeze.
Step 3: Shape the Balls
Scoop out tablespoon-sized portions of the mixture and roll them gently between your palms until you have uniform, round cake balls. Then, arrange these on a baking sheet lined with parchment paper, which helps keep things tidy and makes cleanup a snap.
Step 4: Melt the Chocolate
In a microwave-safe bowl, combine the white chocolate chips with the vegetable oil. Microwave in short bursts of 20-30 seconds, stirring after each interval until the chocolate melts into a smooth and shiny coating perfect for dipping.
Step 5: Coat the Cake Balls
Using a fork, dip each cake ball into the melted white chocolate, rolling to coat completely. Allow any extra chocolate to drip off back into the bowl before placing the coated balls back on the parchment-lined sheet—this extra step ensures a clean, elegant finish.
Step 6: Decorate and Chill
While the chocolate is still wet, sprinkle the cake balls with festive red and green sprinkles for that classic holiday pop. Then, refrigerate them for at least 30 minutes until the coating solidifies completely, giving them that delightful snap when bitten into.
How to Serve Little Debbie Christmas Cake Balls Recipe
Garnishes
These cake balls look amazing on their own, but adding extra festive garnishes like crushed peppermint, edible glitter, or even a drizzle of colored icing can elevate their holiday charm. The colorful sprinkles add both texture and a joyful vibe that instantly brings smiles.
Side Dishes
Pair your Little Debbie Christmas Cake Balls with a hot cup of cocoa, mulled wine, or a creamy eggnog. The richness of these beverages complements the sweetness of the cake balls and creates a cozy, indulgent experience for your guests.
Creative Ways to Present
For a stunning presentation, arrange the cake balls on a tiered serving platter nestled in evergreen branches or pinecones. Alternatively, you can place them in mini cupcake liners or stack them in a decorative jar for gifting. Either way, these treats will steal the spotlight wherever they go.
Make Ahead and Storage
Storing Leftovers
If you have any leftovers, keep them stored in an airtight container in the refrigerator. They’ll stay fresh and delicious for 3-4 days, making them a perfect make-ahead treat for your busy holiday schedule.
Freezing
You can freeze these cake balls to enjoy later—simply place them in a single layer on a baking sheet until firm, then transfer to a freezer-safe container or bag. They’ll keep well for up to 2 months, so you always have a sweet surprise on hand.
Reheating
No need to warm these too much since they’re perfect chilled or at room temperature. If you prefer, let frozen cake balls thaw in the refrigerator overnight and bring to room temperature before serving for best flavor and texture.
FAQs
Can I use a different flavor of Little Debbie cakes for this recipe?
Absolutely! While Christmas Tree Cakes add a festive vibe, feel free to experiment with other Little Debbie varieties. Just keep in mind that flavors and textures will vary slightly based on the cake used.
Is cream cheese necessary, or can I substitute it?
Cream cheese is key because it adds moisture and helps bind the crumbs, but you could try using frosting or marshmallow fluff as alternatives. However, cream cheese delivers the best balance of flavor and texture.
Can I use dark or milk chocolate instead of white chocolate?
Yes, using dark or milk chocolate works perfectly if you prefer those flavors. Just be sure to melt them gently with a bit of oil for a smooth coating like the one achieved here with white chocolate.
How do I prevent the white chocolate from hardening too quickly?
Adding vegetable oil helps keep the chocolate smooth and slows down hardening slightly, making dipping easier. Also, work in small batches to coat the balls before the chocolate firms up.
What’s the best way to ensure the cake balls don’t fall apart?
Mixing the cake crumbs and cream cheese until smooth and pressing the mixture firmly when rolling are the secrets. If it feels too crumbly, a bit more cream cheese can help bring it together.
Final Thoughts
I can’t recommend making the Little Debbie Christmas Cake Balls Recipe enough when it comes to easy, crowd-pleasing holiday treats. They bring together familiar festive flavors in a fun, bite-sized way that’s sure to brighten any gathering. Once you try them, these little bites might just become your new seasonal obsession!
Print
Little Debbie Christmas Cake Balls Recipe
- Prep Time: 15 minutes
- Cook Time: 0 minutes
- Total Time: 45 minutes
- Yield: 12 servings
- Category: Dessert
- Method: No-Cook
- Cuisine: American
Description
Delightfully festive and easy-to-make Little Debbie Christmas Cake Balls combine the classic flavor of Christmas Tree Cakes with creamy cream cheese and a smooth white chocolate coating. Perfect for holiday parties or a sweet seasonal treat, these bite-sized cake balls are decorated with red and green sprinkles to add a joyful touch. No baking required, just simple mixing, rolling, and chilling!
Ingredients
Cake Ball Mixture
- 1 box Little Debbie Christmas Tree Cakes (10 cakes)
- 1/2 cup cream cheese, softened
- 1/2 teaspoon vanilla extract
Coating & Decoration
- 1 cup white chocolate chips
- 1 tablespoon vegetable oil
- Red and green sprinkles (optional, for decorating)
Instructions
- Crumble the Cake: Begin by crumbling the Little Debbie Christmas Tree Cakes into a large bowl. Use your hands or a fork to break them into fine crumbs to create a uniform texture.
- Mix: Add the softened cream cheese and vanilla extract to the cake crumbs. Mix thoroughly until the mixture is smooth and holds together when pressed, indicating it’s ready to be shaped.
- Shape: Scoop tablespoon-sized portions of the cake mixture and roll them between your palms to form smooth, even balls. Place each shaped ball onto a baking sheet lined with parchment paper to prevent sticking and for easy cleanup.
- Melt Chocolate: In a microwave-safe bowl, combine the white chocolate chips and vegetable oil. Microwave in 20-30 second intervals, stirring well after each interval until the chocolate is completely melted and smooth.
- Coat: Using a fork, dip each cake ball into the melted white chocolate, rolling it to coat evenly. Allow any excess chocolate to drip off before returning the coated ball to the parchment-lined baking sheet.
- Decorate: While the coating is still wet, sprinkle red and green sprinkles over the cake balls to give them a festive holiday appearance.
- Chill: Place the coated and decorated cake balls in the refrigerator for at least 30 minutes to allow the chocolate coating to fully set and firm up.
- Serve: Once the coatings are set, serve the cake balls chilled or at room temperature and enjoy this delightful holiday treat.
Notes
- For easier rolling, keep your hands slightly damp or lightly dusted with powdered sugar.
- If white chocolate thickens before coating all cake balls, gently remelt to maintain a smooth consistency.
- Store leftover cake balls in an airtight container in the refrigerator for up to 5 days.
- For a different flavor twist, try dipping cake balls in milk or dark chocolate instead of white chocolate.
- These cake balls can be made a day ahead and stored chilled, making them convenient for holiday gatherings.
