
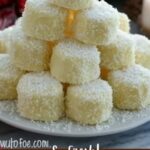
If you have a sweet tooth and love a refreshing burst of peppermint with a creamy, melt-in-your-mouth texture, you are going to adore this Easy Butter Mints Recipe. These charming little mints combine the silky richness of butter with the cool crispness of peppermint extract, delivering an elegant treat that’s incredibly simple to make at home. Whether you’re making them for a holiday gift, a party favor, or just a delightful snack, these butter mints will quickly become a cherished favorite because of their buttery softness and delicate flavor. Trust me, once you try this Easy Butter Mints Recipe, you’ll be hooked!
Ingredients You’ll Need
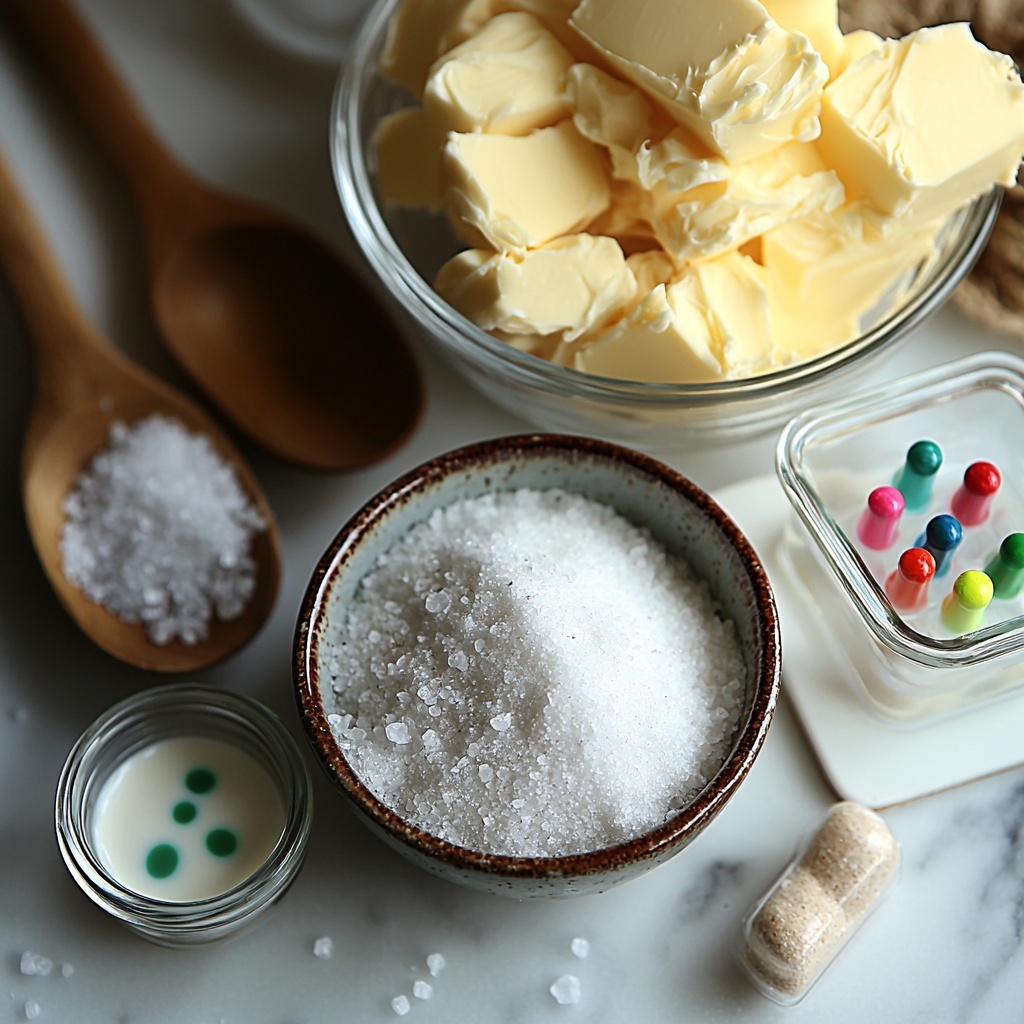
This recipe calls for just a handful of classic ingredients, each playing a crucial role in achieving those perfect buttery mints. The simplicity of these ingredients is what makes this Easy Butter Mints Recipe truly special and accessible for any home cook.
- 1/2 cup unsalted butter, softened: This provides the creamy base that gives the mints their luscious, smooth texture.
- 4 cups powdered sugar: Essential for sweetness and structure, it helps form that signature minty dough.
- 2 tablespoons heavy cream: Adds moisture to create a soft, pliable dough without making it sticky.
- 1/2 teaspoon peppermint extract: The star flavor that gives the mints their refreshing, cool peppermint kick.
- 1/8 teaspoon fine sea salt: A pinch of salt enhances the sweetness and balances the flavors perfectly.
- Gel food coloring, optional: If you want to add a pop of color to your mints, a drop or two will do the trick without affecting flavor.
How to Make Easy Butter Mints Recipe
Step 1: Cream the butter and salt
Start by creaming the softened unsalted butter together with the fine sea salt in a mixing bowl. Beat until the mixture is smooth, creamy, and just a bit lighter in color. This step is crucial because it sets the foundation for the soft and rich texture you want in your mints.
Step 2: Add peppermint and cream
Next, stir in the peppermint extract and heavy cream. Beat again until everything is fully combined and the mixture has a silky, smooth appearance. This blend delivers that classic mint flavor with a creamy finish.
Step 3: Gradually mix in powdered sugar
Begin adding the powdered sugar, about a cup at a time. Start on low speed to avoid a sugar dust storm in your kitchen! Keep mixing until the dough becomes thick and soft but still moldable. This gradual addition ensures your mints have just the right consistency.
Step 4: Adjust dough texture
Test your dough’s texture now. If it feels sticky, sprinkle in a little more powdered sugar. If it’s dry or crumbly, add a few more drops of heavy cream. Achieving the perfect balance here will make rolling and shaping a breeze.
Step 5: Add color if desired
If you want your mints to dazzle in pastel shades or festive hues, divide the dough into portions and knead in a drop or two of gel food coloring into each portion. Make sure the color is evenly distributed for a beautiful finish.
Step 6: Roll into ropes
Lightly dust your work surface with powdered sugar and roll each colored dough portion into a long rope about 1/2 inch thick. This step helps you get even, bite-sized pieces for your mints.
Step 7: Cut into pillow shapes
Using a small, sharp knife or a bench scraper, cut the ropes into tiny pillow-shaped pieces approximately 1/2 inch wide. Lay them out with enough space so they don’t stick together.
Step 8: Let the mints dry
Arrange the cut mints on a parchment-lined baking sheet in a single layer. Let them dry at room temperature for at least 12 hours, or better yet, overnight. This drying process firms the outside while keeping the insides soft and melt-in-your-mouth perfect.
How to Serve Easy Butter Mints Recipe
Garnishes
These butter mints are naturally charming on their own, but you can elevate their appearance by dusting them lightly with extra powdered sugar or decorating with tiny edible silver balls for celebrations. A gentle sprinkle adds a touch of elegance that’s sure to impress your guests.
Side Dishes
Butter mints shine as a sweet finish to any meal, especially alongside a warm cup of tea or coffee. They are also fantastic paired with rich desserts like chocolate mousse or cheesecake, providing a refreshing palate cleanser between bites.
Creative Ways to Present
Imagine these pretty pastel mints arranged in small glass jars tied with ribbons for thoughtful party favors. You could also place them in delicate candy dishes at your holiday table, or even scatter them on a dessert buffet for guests to nibble on throughout the evening. Their charming look and gentle flavor make presentation just as fun as the making.
Make Ahead and Storage
Storing Leftovers
You can store your butter mints in an airtight container at room temperature. They will stay fresh for 3 to 4 days, maintaining their soft texture and wonderful flavor. Keeping them away from heat and humidity is key for preserving their delicate consistency.
Freezing
If you want to enjoy your mints at a later time, they freeze wonderfully. Place them in a sealed container with parchment paper between layers to prevent sticking, and pop them in the freezer. When you’re ready, just thaw them at room temperature for a few hours, and they’ll be as delightful as freshly made.
Reheating
Since these butter mints are best enjoyed cool and soft, reheating is not recommended. Instead, bring frozen mints to room temperature naturally and enjoy their perfect buttery texture and refreshing peppermint taste as intended.
FAQs
Can I use salted butter for this Easy Butter Mints Recipe?
It’s best to use unsalted butter so you can control the amount of salt in the recipe. Using salted butter might make your mints too salty, which could overpower the peppermint flavor.
How long do the butter mints need to dry?
The drying process takes at least 12 hours, preferably overnight. This allows the mints to become firm on the outside while keeping the inside soft and creamy.
Can I substitute peppermint extract with another flavor?
Absolutely! While peppermint is classic, you can experiment with other extracts like vanilla or almond for a different twist. Just be sure to use the same amount to maintain balance.
Why is powdered sugar used instead of granulated sugar?
Powdered sugar dissolves smoothly into the butter mixture, creating a fine, silky dough perfect for shaping. Granulated sugar’s coarse texture would make the mints gritty instead of smooth.
What’s the best way to prevent the mints from sticking together?
Make sure to dust your work surface and cutting tools lightly with powdered sugar. Also, separate the cut mints on your drying tray so they aren’t touching as they firm up.
Final Thoughts
There is something truly magical about making your own candy from scratch, and this Easy Butter Mints Recipe is the perfect way to start. With just a few simple ingredients and a little patience during drying, you’ll have a batch of buttery, minty delights to impress your friends and satisfy your cravings. Give these a try, and I promise they’ll become a sweet staple in your recipe box!
Print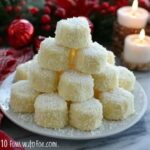
Easy Butter Mints Recipe
- Prep Time: 15 minutes
- Cook Time: 0 minutes
- Total Time: 12 hours 15 minutes
- Yield: 8 servings (about 80-100 mints)
- Category: Candy
- Method: No-Cook
- Cuisine: American
Description
These Easy Butter Mints are a classic, melt-in-your-mouth treat that combine creamy butter with a refreshing peppermint flavor. Perfect for holidays, parties, or gifting, these small, pillow-shaped candies are simple to make at home with just a few ingredients and require no baking, only some patience to let them set properly for the perfect texture.
Ingredients
Butter Mint Dough
- 1/2 cup unsalted butter, softened
- 4 cups powdered sugar
- 2 tablespoons heavy cream
- 1/2 teaspoon peppermint extract
- 1/8 teaspoon fine sea salt
- Gel food coloring, optional
Instructions
- Cream Butter and Salt: In a mixing bowl, beat the softened unsalted butter together with the fine sea salt until the mixture is smooth, creamy, and slightly lighter in color.
- Add Peppermint and Cream: Mix in the peppermint extract and heavy cream, continuing to beat until everything is fully combined and the mixture looks silky smooth.
- Incorporate Powdered Sugar: Gradually add the powdered sugar about one cup at a time, mixing initially on low speed to avoid sugar dust. Continue until a very thick, soft dough forms.
- Adjust Dough Consistency: Assess the dough texture and modify if necessary by adding a bit more powdered sugar if sticky or a few drops of cream if dry and crumbly to achieve a pliable consistency.
- Divide and Color Dough: Separate the dough into portions if multiple colors are desired, then knead a drop or two of gel food coloring into each portion evenly.
- Roll Out Dough: Lightly dust a clean surface with powdered sugar, then roll each colored dough portion into long ropes about 1/2 inch thick.
- Cut Into Mints: Use a small sharp knife or bench scraper to cut the ropes into small pillow-shaped pieces approximately 1/2 inch wide. Separate the pieces to prevent sticking.
- Dry the Mints: Arrange the mints in a single layer on a parchment-lined baking sheet and let them dry at room temperature for at least 12 hours or overnight. They should become firm on the outside but remain soft when bitten.
Notes
- Make sure the butter is softened but not melted for best creaming results.
- Use fine sea salt to avoid a grainy texture.
- Gel food coloring is recommended as it won’t affect dough consistency like liquid colors might.
- Allow adequate drying time to develop the ideal texture; rushing this step will result in sticky mints.
- Store the finished butter mints in an airtight container at room temperature.
- These mints do not require refrigeration and can last up to two weeks when stored properly.