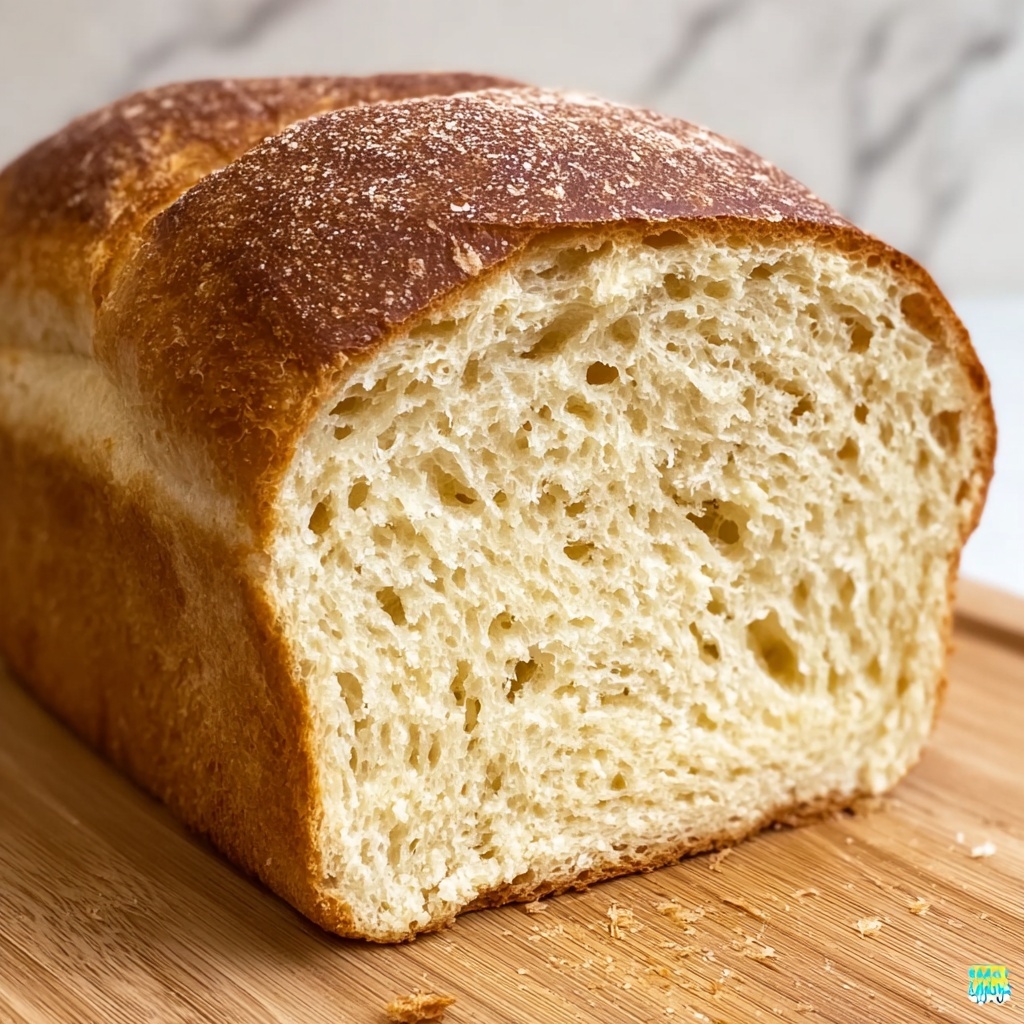
If you have been dreaming of that perfect bakery loaf right at your fingertips, this Wheat Bread Recipe for a Bakery-Style Loaf Recipe is your new best friend. Imagine biting into a loaf with a tender crumb, just the right chew, and a comforting nutty flavor that only whole wheat can deliver. It’s a bread that feels homemade yet impressively professional, a loaf that fills your kitchen with warmth and invites you to slow down and savor every slice. Whether you’re a seasoned baker or just dipping your toes into the magical world of bread baking, this recipe offers clear, calm steps to help you create a bakery-worthy wheat bread that tastes as gorgeous as it looks.
Ingredients You’ll Need
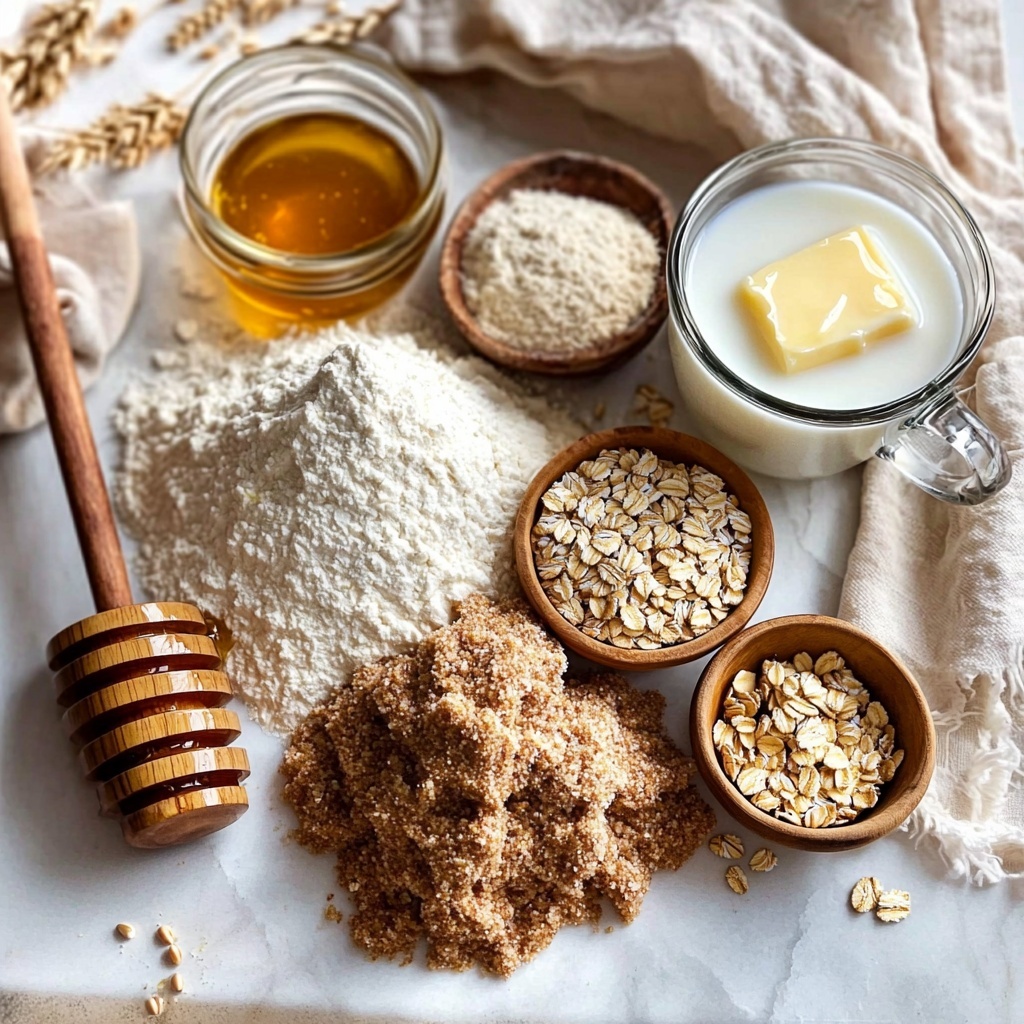
Getting this wheat loaf right starts with a handful of simple, wholesome ingredients—all easy to find but mighty in their impact. Each contributes something essential, from the rich flavor of whole wheat flour to the tenderness that butter brings, culminating in a loaf that’s both beautiful and delicious.
- Whole wheat flour (300 g/2½ cups): The hearty foundation of this bread, giving it that beloved nutty flavor and wholesome texture.
- Bread flour (120 g/1 cup): Adds the extra gluten strength to support a light rise—feel free to swap for more whole wheat if you prefer denser, 100% whole wheat bread.
- Instant yeast (7 g/2¼ tsp): The magic agent that makes your dough rise beautifully and develop flavor—active dry works just as well.
- Fine salt (9 g/1½ tsp): Enhances all the flavors and strengthens the dough structure.
- Warm milk (300 g/1¼ cups): Brings moisture and richness, contributing to that tender crumb; warm water works if you prefer a lighter option.
- Honey (30–40 g/2–3 Tbsp): Adds gentle sweetness and helps with browning—sugar can substitute if you like.
- Melted butter (28 g/2 Tbsp): Brings richness and softness to the dough; olive oil works well as a dairy-free choice.
- Vital wheat gluten (8 g/1 Tbsp): Optional but recommended especially if using all whole wheat flour to give your loaf extra bounce and structure.
- Seeds or oats for topping (2–3 Tbsp): For a charming, rustic finish and extra texture that makes each slice interesting.
How to Make Wheat Bread Recipe for a Bakery-Style Loaf Recipe
Step 1: Mix the Dough
Start by whisking together your whole wheat flour, bread flour, yeast, salt, and if you’re using it, vital wheat gluten. This dry mix is the canvas for your bread. Then add the warm milk, honey, and melted butter directly into your flour mixture. Stir until everything comes together into a shaggy dough with no dry flour patches in sight. The dough should be just a bit tacky but well combined—like it’s ready to hold itself together and transform.
Step 2: Knead Until Smooth and Elastic
Whether you’re opting for a stand mixer or a bit of elbow grease by hand, kneading is your dough’s workout. Knead for about 6–8 minutes in a mixer using a dough hook, or 8–10 minutes on a lightly floured counter by hand. You’ll know you’re on track when the dough feels springy, smooth, and stretches without tearing too quickly. Don’t worry if the windowpane test isn’t perfect—whole wheat dough can be a bit different, and that’s perfectly normal.
Step 3: First Rise (Bulk Fermentation)
Shape your dough into a ball and place it in a lightly greased bowl, covering it with a clean towel or plastic wrap. Let it rest and rise in a cozy spot until the dough has roughly doubled in size, usually about 60–90 minutes depending on your room’s temperature. You’ll know the dough is ready when it springs back slowly, leaving a slight dent when you press your fingertip gently.
Step 4: Shape the Loaf
Turn the risen dough onto a floured surface, gently press it into a rectangle, and roll it up snugly into a loaf. Pinch the seam closed for a tidy finish. Tuck the ends under to create beautiful surface tension, which helps your bread hold its shape and get that tall, sandwich loaf look. Place the seam side down in a greased loaf pan, ready for the final rise.
Step 5: Second Rise (Final Proof)
Cover your loaf again and let it rise until it crowns just above the rim of the pan, creating an airy, confident dough ready for baking. The secret to avoiding a dense loaf is to catch just the right moment—too little rising and it can be tight and heavy; too much and it might collapse. This balanced second rise is what gives your loaf a soft crumb and perfect structure.
Step 6: Bake to a Golden Crust
Bake your loaf in a preheated oven until the crust is a beautiful golden brown and the bread smells irresistibly fragrant. If your crust begins to brown too fast, gently drape some foil on top toward the end to keep it from burning. For the best check, use an instant-read thermometer—the internal temperature should hit between 190–200°F (88–93°C).
Step 7: Cool Before Slicing
This may be the toughest step because it’s so tempting to dive in right away, but let your bread cool on a wire rack completely after a brief rest in the pan. Cutting too soon can squash the crumb and make it gummy. Patience here pays off with slices that hold their shape and melt in your mouth.
How to Serve Wheat Bread Recipe for a Bakery-Style Loaf Recipe
Garnishes
A simple sprinkling of seeds, oats, or even a light brush of melted butter can elevate your loaf’s presentation and add texture. Toasted sesame or sunflower seeds bring a nutty crunch, while a dusting of flour keeps it rustic and charming.
Side Dishes
This wheat bread pairs wonderfully with almost anything! Think creamy soups, vibrant salads, or classic eggs and cheese for breakfast. It’s the perfect companion to dips like hummus or a savory olive oil and balsamic mix for dipping.
Creative Ways to Present
Turn your loaf into sandwiches layered with fresh herbs, roasted veggies, or your favorite deli meats. Or why not slice it thick, toast it, and top it with smashed avocado, tomatoes, and a pinch of chili flakes for something fresh and exciting? The sturdy, soft crumb makes it a versatile canvas.
Make Ahead and Storage
Storing Leftovers
Keep your bread fresh by storing it in a paper or cloth bag at room temperature. Avoid plastic bags which can trap moisture and lead to a soggy crust. Leftover slices are best enjoyed within 2–3 days for peak flavor and texture.
Freezing
To freeze, slice your loaf first so you can grab just what you need. Wrap slices tightly in plastic wrap and place them in a freezer-safe bag. Properly stored, your wheat bread will stay fresh for up to three months.
Reheating
Thaw frozen slices at room temperature or pop them straight into a toaster or oven. Reheating brings back the fresh-baked smell and revives the soft crumb and golden crust beautifully.
FAQs
Can I use all whole wheat flour for this recipe?
Yes, you can swap all the bread flour for whole wheat, but adding vital wheat gluten is highly recommended to help the loaf rise better and stay light, since whole wheat flour has less gluten naturally.
What can I substitute for honey?
You can use granulated sugar, maple syrup, or agave nectar as alternatives to honey. Each adds a bit of sweetness and helps with browning, so feel free to experiment with your favorite sweetener.
Is it necessary to use milk instead of water?
Not at all! Milk gives extra richness and a tender crumb, but warm water works fine if you prefer a lighter loaf or are looking for a dairy-free option.
How do I know when the bread is done baking?
The best way is to use an instant-read thermometer, aiming for 190–200°F (88–93°C) inside the loaf. It should also have a deep golden color and sound hollow when tapped on the bottom.
Can I add mix-ins like nuts or dried fruit?
Absolutely! Tossing in nuts, seeds, or dried fruits can add wonderful texture and flavor to your loaf. Just add them during or after initial mixing to evenly distribute without interfering with the dough’s rise.
Final Thoughts
I hope this warm, inviting Wheat Bread Recipe for a Bakery-Style Loaf Recipe inspires you to bake a loaf that fills your home with joy and beautiful aromas. Baking bread is such a rewarding experience, and with these straightforward steps, you’re set for delicious success. So grab your mixing bowl, roll up your sleeves, and enjoy crafting a loaf that tastes like it came straight from a cozy neighborhood bakery.
Print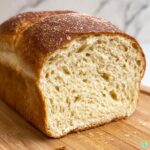
Wheat Bread Recipe for a Bakery-Style Loaf Recipe
- Prep Time: 20 minutes
- Cook Time: 35 minutes
- Total Time: 4 hours including rising times
- Yield: 12 servings (one loaf)
- Category: Bread
- Method: Baking
- Cuisine: American
- Diet: Vegetarian
Description
This bakery-worthy wheat bread recipe delivers a soft, tender crumb with a beautiful rise using a combination of whole wheat and bread flour. Perfect for homemade sandwiches or toast, the dough is simple to make with a calm, step-by-step approach. A touch of honey and melted butter enriches the loaf, while optional vital wheat gluten enhances the texture, resulting in a truly satisfying and wholesome bread.
Ingredients
Dry Ingredients
- 300 g whole wheat flour (about 2½ cups)
- 120 g bread flour (about 1 cup)
- 7 g instant yeast (2¼ tsp or active dry yeast, same amount)
- 9 g fine salt (1½ tsp)
- 8 g vital wheat gluten (1 Tbsp, optional, especially helpful if using 100% whole wheat)
Wet Ingredients
- 300 g warm milk (1¼ cups) or warm water
- 30–40 g honey (2–3 Tbsp) or sugar (2 Tbsp)
- 28 g melted butter (2 Tbsp) or olive oil (2 Tbsp)
Toppings (Optional)
- 2–3 Tbsp seeds or oats
Instructions
- Mix the dough: In a large bowl or stand mixer bowl, whisk together whole wheat flour, bread flour (if using), yeast, salt, and optional vital wheat gluten. Add the warm milk or water, honey, and melted butter or olive oil. Stir until a shaggy dough forms with no dry flour pockets. Aim for a slightly tacky but cohesive dough.
- Knead until smooth and elastic: Using a stand mixer with a dough hook, knead for about 6–8 minutes. If kneading by hand, do so on a lightly floured surface for about 8–10 minutes. The dough should become smooth, springy, and stretch without tearing easily.
- First rise (bulk fermentation): Shape the dough into a ball, place in a lightly greased bowl, and cover. Let it rise in a warm spot until doubled in size and puffy, usually 60–90 minutes. Check readiness by pressing a fingertip into the dough; it should slowly spring back leaving a slight dent.
- Shape the loaf: Turn the dough onto a lightly floured surface and gently press into a rectangle. Roll it snugly into a log, pinch the seam closed, and tuck the ends under to create surface tension. Place seam-side down into a greased loaf pan.
- Second rise (final proof): Cover the pan and let the dough rise until it crowns just above the pan’s rim. Avoid under-proofing, which leads to splitting, and over-proofing, which can cause collapsing.
- Bake to a golden crust: Bake in a preheated oven until the loaf is deeply fragrant and golden on top. If browning occurs too fast, tent with foil. Use an instant-read thermometer to check the center; it should register 190–200°F (88–93°C).
- Cool before slicing: Let the bread cool briefly in the pan, then transfer to a wire rack to cool completely. This prevents a gummy crumb and ensures ideal texture when sliced.
Notes
- Using vital wheat gluten improves texture, especially if using 100% whole wheat flour.
- Warm milk or water should be around 100–110°F to activate yeast without killing it.
- Honey can be substituted with sugar for sweetness.
- Allow the dough to proof fully for best rise and crumb.
- Tenting with foil prevents the crust from over-browning while baking.
- Cool bread completely before slicing to avoid gummy texture.


